
Cart is empty
Heater Dismounting and Disassembly. Replacement or checking of the heater components requires its partial disassembly.
Partial disassembly of the mounted heater is allowed, if there is an access to the dismounted components.
4.1. –Dismounting and Disassembly of PLANAR-2D
- remove the heater from VEH
- remove the upper and lower casings
Casing should be removed as follows:
a) Remove clips. To remove clip, use screwdriver (with a thin tip) to pry the clip out and slide it left or right for full release (Fig. 1)
b) Remove grids rotating them in either direction
c) Remove upper and lower casing shells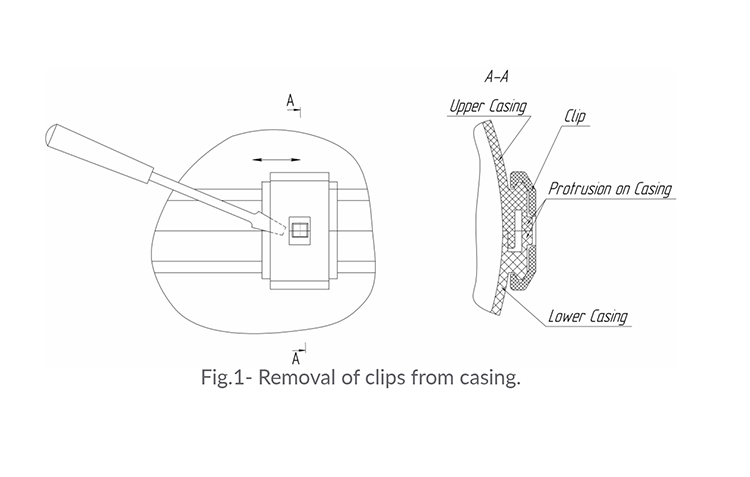
- disconnect the contacts from the control unit (1 – glow plug contacts, 2 – sensor contacts, 3 – AB contacts); 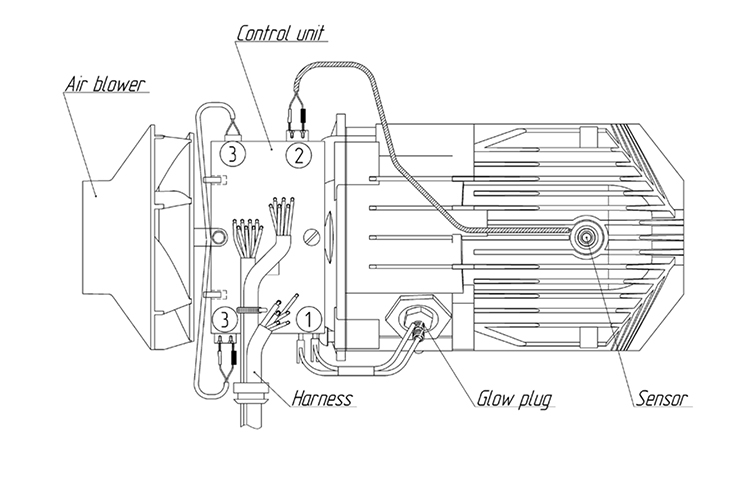
- remove glow plug and bushing (use S=27 to hold bushing, and S=12 to turn glow plug out);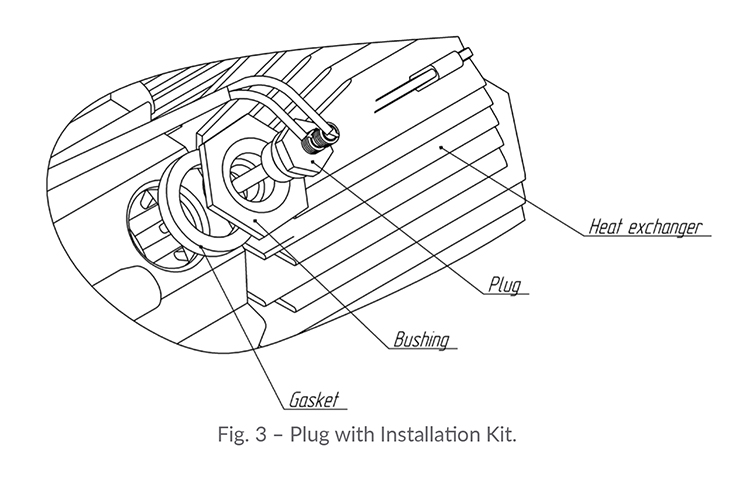
- remove secure screw of CUand dismount it
- remove screws fastening AB to heat exchanger and disconnect AB
- remove screws fastening screen to CC, remove screws fastening CC to heat exchanger, remove CC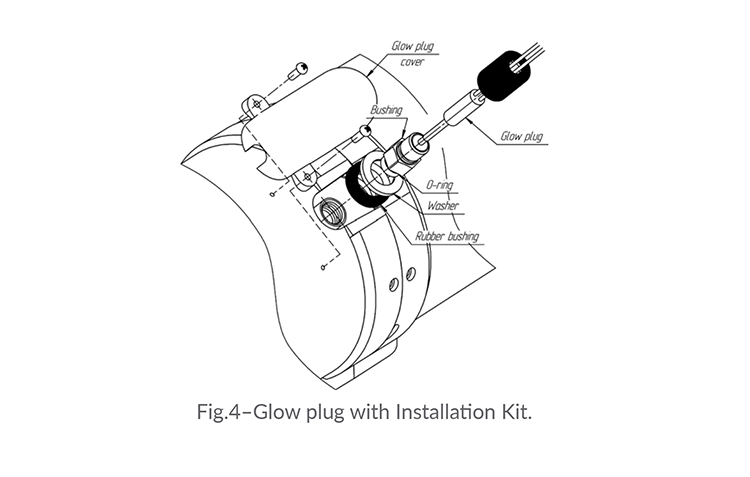
4.2. – Dismounting and Disassembly of PLANAR-4DM2
- remove heater from VEH
- remove fastening screws of the plug cover remove fastening screws of casing, remove casing halves
- disconnect glow plug connector and other connectors from control unit
- remove fastening screw of the control unit and dismount it
- remove glow plug from bushing and turn bushing out
- removes crews fastening AB to the intermediate unit and disconnect AB
- remove screws fastening the intermediate unit to the heat exchanger (inside housing of the intermediate unit) and remove intermediate unit
- remove screws fastening CC to heat exchanger
4.3. – Dismounting and Disassembly of PLANAR-44D
- remove heater from VEH - remove upper and lower casing shells (Fig.1)
- disconnect contacts from CU, remove fastening screw of CU, dismount it
- turn out glow plug - remove screws fastening AB to intermediate unitand dismount AB
- remove screws fastening intermediate unit to heat exchanger and dismount intermediate unit together with CC
- remove screws fastening CC to intermediate unit 4.4.
–
4.4 Dismounting and Disassembly of PLANAR-8DM
- remove heater from VEH
- remove fastening screws of glow plug cover and control unit
- disconnect all contacts from CU, dismount CU
- remove fastening screws of casing halves,dismount them
- remove glow plug cap, unscrew glow plug
- remove fastening screw of AB from intermediate unit, dismount AB
- disconnect CC with intermediate unit from heat exchanger (unscrew nuts on the perimeter of intermediate unit)
- remove screws fastening CC to intermediate unit
Comments
No posts found